
There is nothing quite like looking down a sidewalk and seeing a crisp, laser-straight edge slicing between the concrete and a lush bed of turf. It is the ultimate flex for any lawn care obsessive. But if your pristine lines are starting to look ragged, or if your machine is vibrating like a jet engine at takeoff, your blade is likely cooked. Learning how to change a cordless lawn edger blade safely is a mandatory skill if you want to keep that curb appeal sharp without making an unexpected trip to the emergency room.
When I’m out in the yard, I see too many homeowners treating battery-powered tools like toys. Just because it doesn’t have a pull-cord or exhaust pipe doesn’t mean it won’t slice through a work glove in a fraction of a second. If your current tool is constantly bogging down even with a fresh edge, it might be time for an upgrade to the best cordless lawn edger with blade setups on the market today. But if your motor is strong and only the steel is worn down, let’s get that dull, beaten piece of metal swapped out for a fresh one.
The Danger of the “Ghost Start” and Other Common Mistakes
In my experience, the biggest threat when working on battery-operated yard gear isn’t a faulty tool—it’s human complacency. With a gas edger, you know it’s dangerous because the engine is loud and heavy. Battery tools are silent assassins. If you leave the power source connected while swapping parts, a simple bump of the safety switch and trigger can activate the brushless motor instantly.
Beyond accidental startups, here are a few critical mistakes I see people make all the time:
- Reusing a Bent Washer: The flanged washers hold the blade completely flat. If you hit a rock and warped the washer, reusing it will cause the new blade to wobble, destroying your gear gearbox over time.
- Over-tightening the Mandrel Nut: Cranking down on the nut with an impact wrench can strip the spindle threads or crack the replacement blade.
- Ignoring the Spinning Direction: Many edger blades are bi-directional, but some specialty options have a specific rotation orientation. Install it backward, and you’ll be tearing up your grass instead of cutting it.
Read More: Plastic vs. Steel Blades: Which is Best for Battery Edgers?
Tools and Prep: Setting Up Your Workspace
Before you even touch the machine, clear off a flat, stable workbench or a clean patch of driveway. Trying to change a blade while kneeling in muddy grass is a fast track to losing a nut or stripping a bolt.
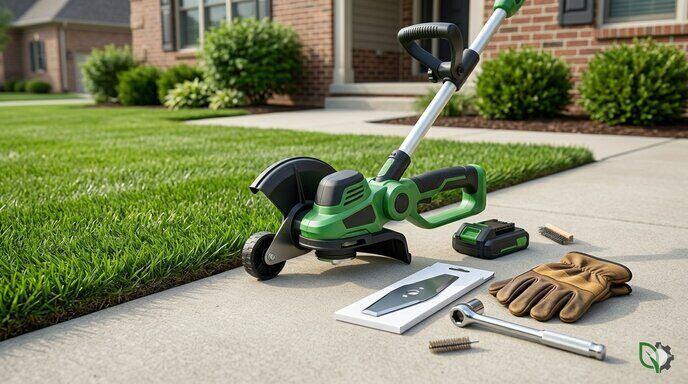
Gather these tools before you start:
- Heavy-duty leather work gloves
- The holding pin or locking wrench (usually came with your tool)
- A socket wrench or the manufacturer-supplied spark plug/mandrel tool
- A wire brush
- A replacement edger blade (ensure the center arbor hole matches your spindle diameter, typically 1 inch or 1/2 inch)
5 Steps to Change a Cordless Lawn Edger Blade Safely
Follow this exact sequence to ensure a flawless, accident-free swap.
Step 1: Isolate the Power Source
Remove the lithium-ion battery completely from the tool bay. Do not just rely on the trigger lock button. Physically separating the battery ensures there is zero chance of electrical current reaching the motor while your fingers are near the cutting deck.
Step 2: Lock the Spindle (Mandrel)
Locate the small alignment hole on the gear housing just above the blade guard. Insert your holding pin, an Allen wrench, or a screwdriver into this hole. Rotate the blade slowly by hand until the pin drops deeper into the inner blade adapter slot. This locks the shaft completely so it cannot spin while you loosen the nut.
Step 3: Remove the Worn Blade
Most modern edgers utilize a left-handed thread (reverse thread) to prevent the nut from spinning off during operation. Check your manual, but typically you will need to turn the nut clockwise to loosen it. Slip your socket wrench over the nut and break it loose. Remove the nut, the outer flanged washer, and the old blade.
Pro-Tip: Clean the Spindle Deck
Once the old blade is off, you’ll notice a thick cake of packed dirt, dried grass clippings, and sap covering the inner adapter. Do not just slap the new blade over this debris! Grab your wire brush and scrub the spindle and washers clean. Any debris trapped between the washers will cause the blade to sit unevenly, creating severe vibrations that can destroy the tool’s bearings.
Step 4: Mount the Fresh Blade
Slide the new blade onto the spindle. Make sure it sits perfectly flush on the inner flange adapter. If your blade has text stamped on it (like “This Side Out”), make sure it faces you. Place the outer flanged washer back over the spindle, ensuring its splines or flat edges align perfectly with the shape of the shaft.
Step 5: Secure and Torque the Nut
Thread the mandrel nut back on by hand turning it counter-clockwise. Re-insert your locking pin into the gear housing to secure the spindle. Use your socket wrench to tighten the nut firmly. It needs to be snug enough that the blade cannot slip under load, but do not throw your entire body weight into it—over-tightening risks damaging the tool’s transmission.
Post-Maintenance Safety and Testing
Once everything is tightened up, remove the locking pin from the gearbox. Give the blade a gentle spin by hand (while wearing your heavy leather gloves) to ensure it spins completely true and doesn’t rub against the metal blade guard or debris deflector shield.
Step back, insert the battery, and clear the area of any pets or bystanders. Hold the edger firmly with both hands, point the cutting head away from your body down toward open ground, and engage the trigger for about 10 to 15 seconds.
Listen closely. You want to hear a smooth, consistent hum. If you notice any unusual shaking, rattling, or a rhythmic thumping sound, let go of the trigger immediately, pull the battery back out, and inspect your work. Nine times out of ten, a vibration means the blade isn’t centered perfectly on the inner adapter flange or the outer washer was put on upside down.
Taking an extra five minutes to master how to change a cordless lawn edger blade safely keeps your equipment running smoothly and guarantees those crisp, professional edges every weekend. Keep your tools maintained, protect your hands, and enjoy having the sharpest lawn on the block.