
There is something deeply satisfying about prepping a fresh patch of dirt for a brand new planting project. When I’m out in the yard getting ready to establish a small wildflower zone or a tiny patch of fresh turf, getting the soil texture right is half the battle. But for compact landscaping projects, hauling out a heavy, gas-guzzling rotary tiller is an absolute nightmare. It’s loud, it’s aggressive, and it completely obliterates your delicate topsoil structure. That leaves many homeowners wondering: can you use a long handle cultivator to prep a small seed bed, or do you absolutely need heavy machinery to get the job done right?
In my experience, you don’t need to break your back or lease commercial equipment to establish a flawless planting zone. Reaching for a specialized no bend garden weeder cultivator tool allows you to stand completely upright while fracturing compacted surface crusts with surgical precision. Hand tools give you incredible control over your dirt without destroying beneficial fungal networks or earthworm channels. Let’s break down exactly how these manual implements perform under pressure, compare them to power tillers, and look at a detailed blueprint to prep your dirt like a seasoned pro.
Tool Breakdown: Manual Cultivators vs. Power Tillers
To understand why a manual tool works so beautifully on a smaller footprint, we need to look at how different cultivation methods affect your soil profile. Many people use the terms “tilling” and “cultivating” interchangeably, but they are entirely different operations.
| Equipment Metric | Long Handle Manual Cultivator | Small Gas/Electric Power Tiller |
| Primary Function | Loosening surface crust, blending amendments, weeding | Deep soil fracturing, breaking up thick undisturbed sod |
| Maximum Working Depth | $2$ to $4\text{ inches}$ (Ideal for most grass and flower seeds) | $6$ to $8\text{ inches}$ (Overkill for surface seed beds) |
| Soil Structure Impact | Preserves macro-pores and earthworm pathways | Can pulverize soil particles, creating a hardpan layer below |
| Physical Strain Profile | Upper body workout, but zero vibrational nerve fatigue | Heavy lower back strain and aggressive machine bucking |
| Best Project Size | Plots under $100\text{ sq ft}$, raised beds, border fringes | Massive backyard vegetable gardens, new plot clearing |
The Danger of Over-Tilling Small Spaces
When you hit a small residential plot with a high-RPM power tiller, you risk turning your soil into fine dust. The moment a heavy rainstorm hits that pulverized dirt, the surface dries into an impenetrable, concrete-like glaze. This makes it incredibly difficult for fragile, emerging seed radicles to break through to daylight. A manual tool fractures the soil while leaving micro-aggregates intact, which keeps the dirt spongy, breathable, and perfectly hospitable to new seeds.
How-To: Prepping Your Seed Bed Perfectly with a Manual Cultivator
If you want to use a long handle cultivator to prep a small seed bed safely and effectively, you cannot just blindly stab at the dirt. You need to follow a structured approach to create a crumbly, high-utility planting matrix.
Step 1: Evaluate and Target Soil Moisture
Never work bone-dry or soaking-wet soil. Squeezing wet clay or dense silt into a ball should yield a crumbly mass that breaks apart under light thumb pressure. If it molds like playdough, wait 48 hours for it to dry out. If it is hard as a brick, run a sprinkler over the zone for 20 minutes, then wait 24 hours before stepping onto the plot.
Step 2: Clear Surface Vegetation and Debris
Do not try to cultivate directly through thick weed mats or living grass turf. Use a sharp spade or a half-moon edger to skim off the top layer of existing sod. Shake out any loose topsoil from the grass roots back onto your bed, then toss the remaining root clumps into your compost bin. Remove any large rocks or thick tree roots that could break your cultivator tines.
Step 3: Broadcast Your Organic Soil Amendments
Before you turn a single inch of dirt, lay down your structural upgrades. Spread a $1\text{-inch}$ layer of premium, well-aged compost, worm castings, or fine leaf mold right over the surface. If your soil is notoriously heavy or depleted, this is also the ideal time to lightly scatter a well-balanced starter fertilizer.
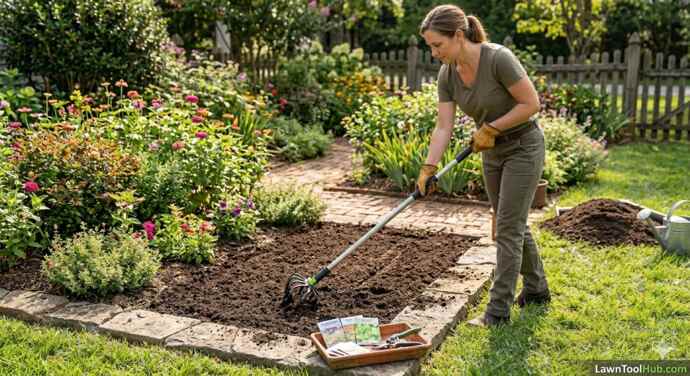
Step 4: Execute the Cross-Hatch Cultivation Technique
Set the steel tines of your long handle cultivator at the edge of the bed. Drive the prongs down into the top $3\text{ inches}$ of dirt using steady, fluid pressure, then pull back firmly to slice through the crust. Work your way down the plot in straight, parallel lines. Once you complete the first pass, turn exactly 90 degrees and repeat the process across your original lines. This cross-hatch pattern thoroughly incorporates your compost and eliminates hidden, compacted chunks.
Step 5: Level and Firm the Bed Frame
Flip your tool over if it has a flat leveling edge, or grab a standard metal bow rake. Smooth out the surface until it is as level as a tabletop. The soil should look like fine coffee grounds. Lightly tamp the surface down with the back of your rake or roll a light lawn roller over it. You want the bed firm enough that your shoes only leave a faint imprint, ensuring excellent seed-to-soil contact without creating compaction.
Tool Care and Ergonomic Safety Tips
- Maintain Your Stance: Keep your core engaged and your back straight when manipulating a manual tool. Let your leg muscles and hips drive the forward momentum rather than leaning over and placing the entire burden on your lumbar spine.
- Keep the Tines Sharp: Manual cultivation relies on clean cutting action. Take a flat mill file to the tips and leading edges of your cultivator prongs once a season to remove burrs and restore a sharp edge that slices effortlessly through tough roots.
- Prevent Rust In Storage: After completing your project, blast away stuck-on mud with a hose, wipe the tool dry with an old rag, and spray the metal head with a thin coat of penetrating oil to stop corrosion in its tracks.
Frequently Asked Questions
Can a manual cultivator break up hard, unworked clay soil?
It can, but it requires patience and muscle power. If you are dealing with raw, undisturbed clay that has never been planted before, you will have a much easier time if you open the initial cracks with a heavy garden fork first. Once the large plates of clay are broken open, your manual cultivator can easily reduce those large clods into a fine, crumbly seed bed.
How deep do I actually need to cultivate for grass seed vs. vegetables?
For standard turfgrass seed, wildflowers, and small-seeded annuals, you only need a loose soil bed that is $1$ to $2\text{ inches}$ deep. Deep tilling is actually counterproductive because it buries the seeds too far down where they will rot. For large vegetable crops or deep root vegetables like carrots, you will want to expand your cultivation depth down to $5$ or $6\text{ inches}$.
What should I do if my cultivator keeps getting jammed with roots?
If you are working near established shrubs or trees, fine feeder roots will quickly wrap around your tool’s prongs. Don’t try to force your way through them. Keep a pair of bypass hand pruners in your pocket. The moment the tool clogs, pull it up, snip the tangled roots away from the prongs, and keep working your grid pattern.