There is nothing quite like looking out over your yard and seeing a dense, vibrant carpet of green turf. It is the ultimate reward for your hard work. But if your home is built over heavy, compacted earth, you know that keeping it looking spectacular is a constant battle against the elements. When I’m out in the yard tackling springtime maintenance, addressing compaction is always at the top of my list. If your ground feels like solid concrete, you are probably asking yourself a crucial operational question: should you water clay soil before using a hand aerator, or will that turn your lawn into an unusable, muddy mess?
The short answer is yes—but timing and moisture depth are everything. Pushing a manual lawn aerator for hard clay soil into bone-dry earth is a recipe for a pulled muscle and a bent tool. On the flip side, over-saturating the ground will destroy your soil structure and clog your equipment completely. Let’s look at the science behind how water interacts with clay plates, bust a few common backyard myths, and walk through exactly how to prep your property for a flawless aeration session.
Myth vs. Fact: The Realities of Pre-Watering Clay Earth
If you read generic gardening forums, you will find wildly conflicting advice on soil prep. Let’s debunk the most common misconceptions so you don’t accidentally ruin your turf.
Myth 1: “Aerating bone-dry clay is fine if you just step harder on the tool.”
- The Fact: Dry clay particles bind together with incredible electrostatic strength, forming a microscopic matrix that mimics concrete. No matter how much body weight you throw onto a step-bar, manual tines cannot cleanly penetrate dry clay. Attempting to force it will either shatter your tool’s welds or warp the hollow cores.
Myth 2: “The wetter the soil, the easier it is to pull perfect plugs.”
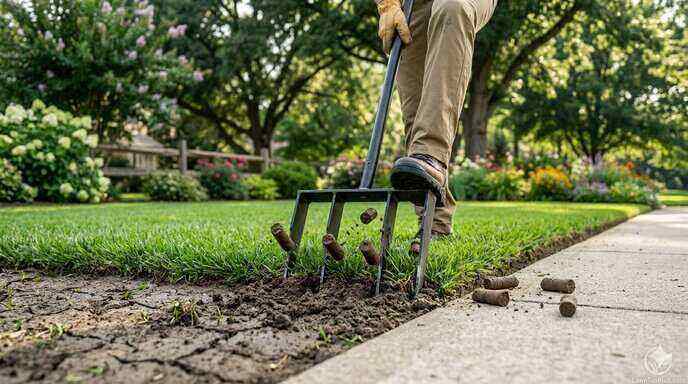
- The Fact: Total saturation is actually worse than bone-dry conditions. When clay is completely waterlogged, it loses all structural shear strength. Instead of cutting a clean, cylindrical plug, a coring tool will simply push mud outward into the surrounding grass roots. This worsens compaction sideways and glues the inside of your tines shut with a sticky, vacuum-sealed clay paste.
The Moisture Goldilocks Zone: Soil Conditions Compared
To successfully navigate the question of whether you should you water clay soil before using a hand aerator, you need to target a specific mechanical sweet spot known as “field capacity.” This occurs when the soil has drained away excess gravitational water but still holds moisture within its pores.
| Soil Moisture Level | Tool Penetration Ease | Core Quality & Extraction | Risk of Compaction Worsening |
| Bone-Dry (Baker’s Clay) | Extremely Difficult. Tines skim or bounce off the surface. | No cores extracted; fractures surface turf unevenly. | Low risk to soil, high risk of tool damage. |
| Field Capacity (The Sweet Spot) | Excellent. Smooth penetration with moderate foot pressure. | Perfect. Clean, structural cylinders lift out easily. | None. Maximizes air and water entry pathways. |
| Saturated / Waterlogged | Easy downward push, but difficult upward pull. | Poor. Slurry plugs collapse or stick inside tines. | High. Destroys soil pore structures instantly. |
Practical FAQ: Master Your Manual Aeration Technique
How many hours before aerating should I water my lawn?
In my experience, the ideal window is 24 to 48 hours before you plan to step onto the lawn. If you run your sprinklers for roughly 20 to 30 minutes on a Friday evening, the water will have ample time to migrate deep down into the root zone by Sunday morning. This allows the top layer of thatch to dry out enough to walk on, while the subsoil remains soft and pliable.
How can I test if my clay soil is ready for a hand tool?
You can perform a simple, hands-on field test using a long screwdriver or a metal step-stake:
- Find a representative patch of grass and try to push the screwdriver vertically into the dirt using only one hand.
- If it stops short after an inch, the ground is too dry; apply more water.
- If it slides all the way down to the handle with zero resistance and leaves a muddy rim, it is too wet.
- If it pushes down smoothly 3 to 4 inches with firm, steady resistance, your clay is perfectly primed.
What should I do if my manual coring tines keep getting clogged?
Clay clogs are an inevitability when using manual equipment, but you can minimize them with a quick preparation trick. Before you start, spray the inside and outside of your hollow tines with a thin coat of silicone lubricant or dry-film Teflon spray. Keep a large carriage bolt or a long stick in your pocket. If a dense plug gets wedged, use the bolt to push the obstruction backward out of the top of the tine before continuing.
Should I leave the extracted clay plugs on the lawn?
Yes, absolutely leave them right where they fall. While a yard covered in little dirt cylinders looks slightly messy for a week or two, those plugs are filled with valuable soil microbes. As they break down from subsequent waterings and foot traffic, the clay will remix with your organic thatch layer, creating a much healthier, top-dress soil texture.
Pro-Tips for Managing Heavy Clay Compaction
- Aerate When the Grass is Active: Only use your coring tools when your specific grass type is actively growing (early spring or fall for cool-season grasses; mid-summer for warm-season varieties). This ensures the root systems can rapidly expand into the newly created open voids.
- Top-Dress with Organic Compost: Once you have finished pulling your plugs, take the opportunity to spread a thin, quarter-inch layer of finely screened organic leaf compost or coarse masonry sand across the turf. The material will wash straight down into the open aeration holes, physically preventing the surrounding clay walls from collapsing back together and locking in long-term drainage benefits.